Create a subscription plan group
- 03 May 2023
- 3 Minutes to read
- Print
- DarkLight
Create a subscription plan group
- Updated on 03 May 2023
- 3 Minutes to read
- Print
- DarkLight
Article summary
Did you find this summary helpful?
Thank you for your feedback!
Subscription plan groups configure the subscription options that customers will see in your store. You'll use subscription plan groups to set recurrence schedules, anchor subscription orders to specific days, apply customer and order tags and more.
Add your first subscription plan group
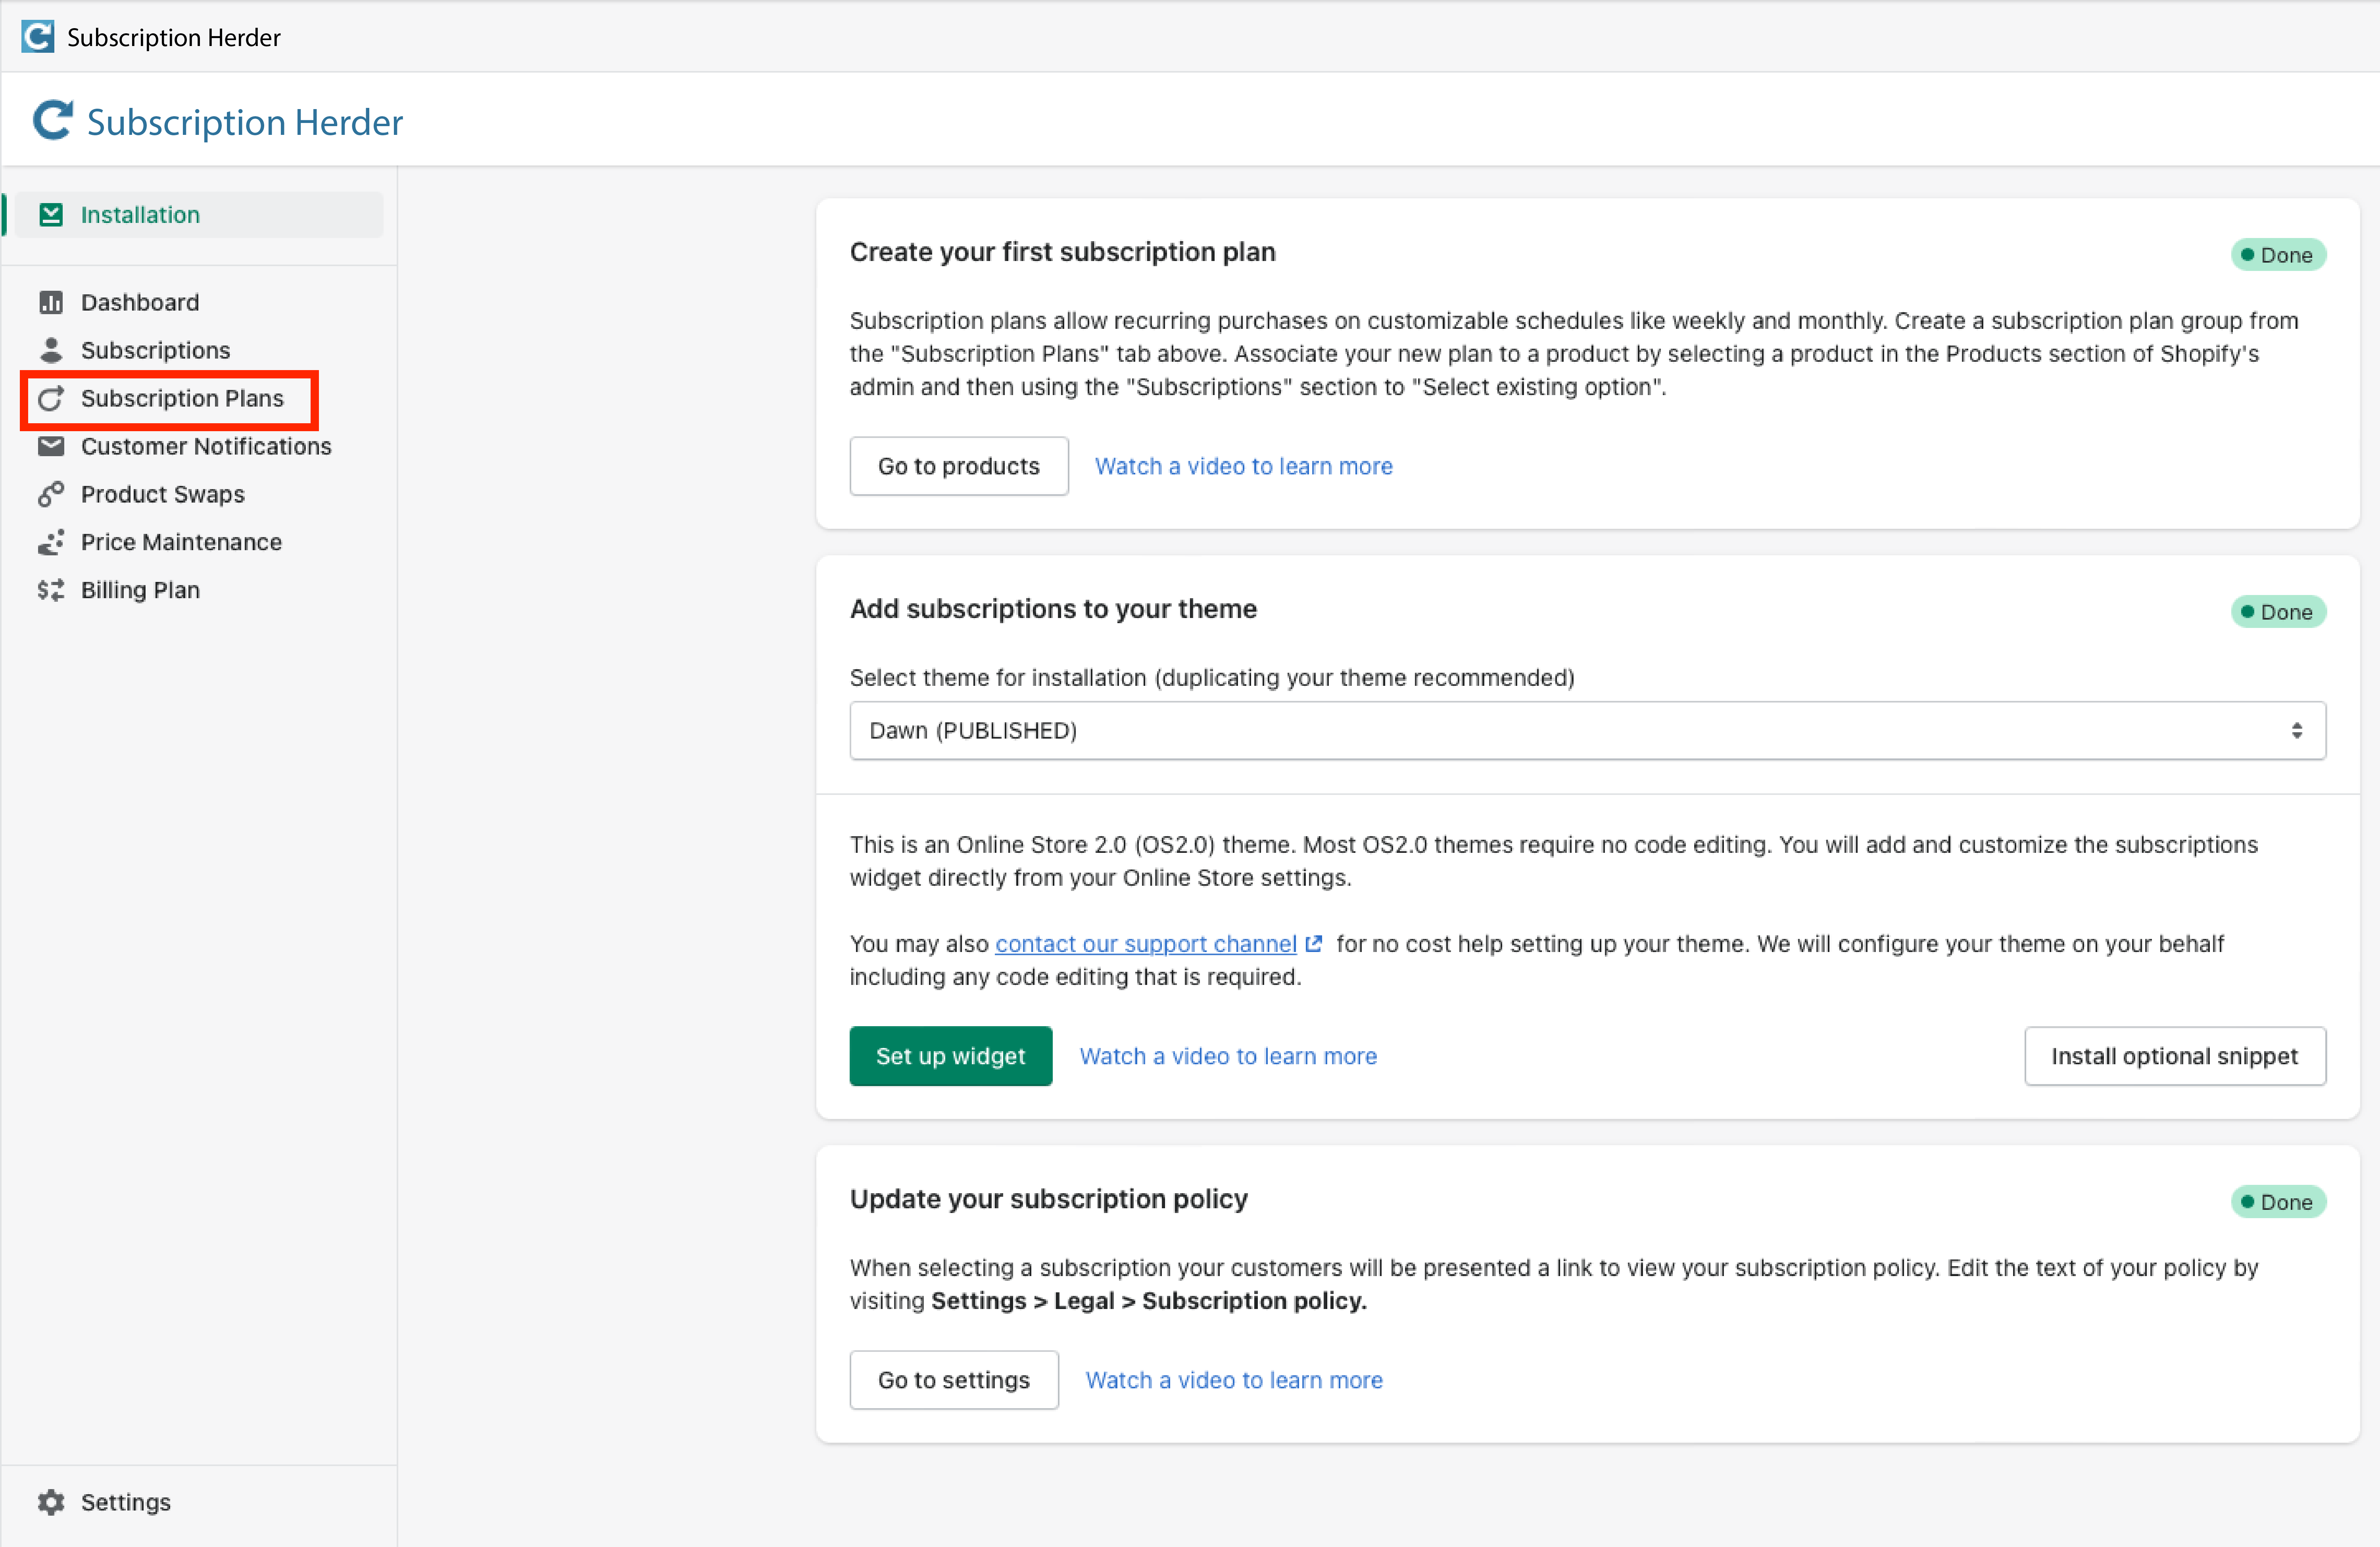
You can create and update subscription plan groups in just a few minutes directly from the Subscription Herder app. To get started open Subscription Herder from the Apps section of your Shopify store. Then, click the tab for "Subscription Plans" show in red below.
From the Subscriptions Plan page click "Create new" to get started.
Types of plans
Subscription Herder supports several different types of subscription plans and their set up is controlled entirely within the app. Some examples of the plan possibilities are:
- Subscribe and save plans - These plans create a new order on a fixed, recurring interval like weekly or monthly. Customers are charged with each order instance.
- Prepaid plans - These plans let customers pay for several shipments up-front and receive them on a recurring schedule. For example, a customer may select to be billed every 3 months for shipments that arrive once per month. In this example, customers are billed every 3 months and a single order is created in Shopify with 3 fulfillment orders attached to it.
- Auto-cancelling plans - Plans can be set to cancel after a specific number of payments by the customer allowing things like rent-to-own.
- Specific order dates - Plans can have delivery and billing anchors that ensure subscription billing happens on specific dates. These dates can be specific weekdays, day of the month and even specific calendar dates.
Creating a subscribe and save style plan
After clicking the "Create new" button to create your first subscription plan start by configuring the basic plan details like name and a special merchant code. An example is show below. Depending on the widget that you select for your storefront the "Name" field may be used to let customers select between this plan group and any others available on the product as well as the option to make a one-time purchase.

Customer and order tagging
The subscription group tag setup section can be left blank. Learn more about customer and order tagging here.
Configuring a subscription plan with a discount
Now, you can add a plan with specific delivery and billing options as well as a discount for subscribers. Here we'll add a single plan for monthly deliveries with a 10% discount. Since we're using a percentage discount the discount is automatically calculated against the price of the product variant and supports multi-currency.
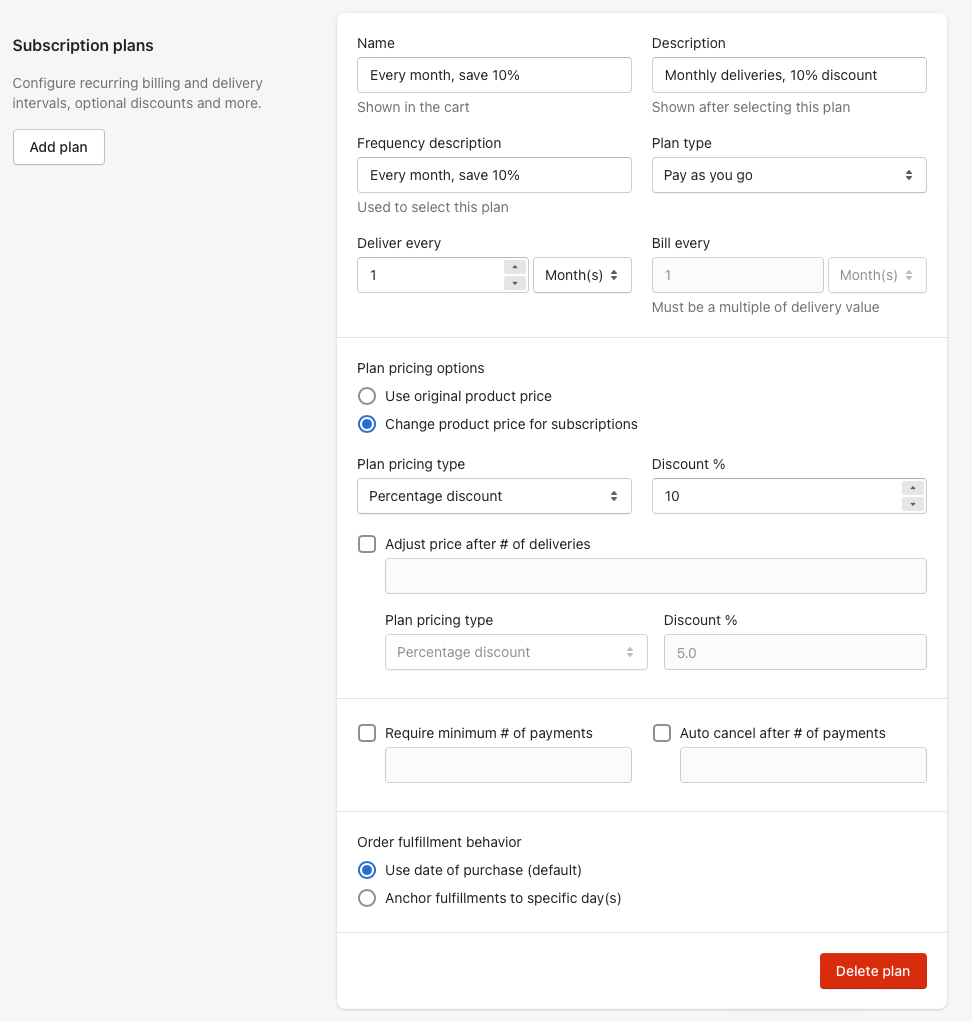
The plan type "Pay as you go" refers to the one-to-one order to customer charge that exists for a subscribe and save style plan. In other words, customers pay as they go. In this case, a subscriber would be charged each month and an order with a single fulfillment order would be created in Shopify.
Anchor recurring billing to specific dates
In this example we allow recurring orders to be billed on any day and so do not add any anchors. Regardless of your anchor setup orders are accepted on any day. Anchors only affect the initial order fulfillment timing as well as recurring order billing schedules. Learn more about anchors here.
Adding more plan options to this group
Use the button "Add plan" to continue adding additional options if applicable. For example, you can add additional recurrence schedules like every 2 months, every quarter, yearly and more.
Saving and using your first subscription plan group
When you have finished configuring your subscription plan group make sure to click "Save" to save your new group. Now, we'll add the plan to a product so customers can start purchasing subscriptions as soon as we have set up the storefront widget.
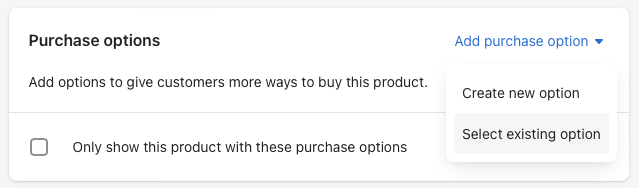
In the Shopify admin visit Products and pick a product that should offer your newly created subscription option. Then, scroll down to the Purchase options card and use the "Add purchase option" menu to select the subscription plan group you just created.
When you're done you should see one or more subscription plan groups associated to your product.
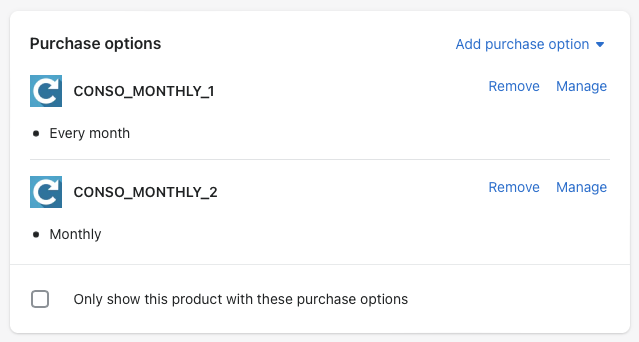
If you only want to offer subscriptions and hide the One-time purchase option you can check the box above to "Only show this product with these purchase options".
Was this article helpful?